How To Track Payback Period in Google Ads
There are two north star metrics for any SaaS brand running Google Ads
- How many purchases or upgrades did ads drive
- What is the payback period on dollars spent
Using payback period as a metrics to optimize towards will mean you can allocate more ad spend to campaigns and keywords that are working more efficiently.
Here’s exactly how you do it.
Conversion Tracking Configuration
To be able to have a payback period in the Google Ads dashboard you are going to need to pull values in with the conversions that are fired.
If you’re setting this up with Google Tag Manager you can include the value as a parameter in a dataLayer.push().
Alternatively if you are using hardcoded tags then you can include the dynamic value in the Google tag.
Most SaaS brands push the initial purchase value in the conversion event, however, you could also push ARR or expected LTV if you have quality data on average retention metrics.
Custom Column Set Up
With Google Ads custom columns we are going to set up two columns for measurement - new MRR generated and payback period.
This is useful as it is going to show you both the volume and efficiency of the campaigns.
- From your Campaigns tab go to Columns > Modify columns
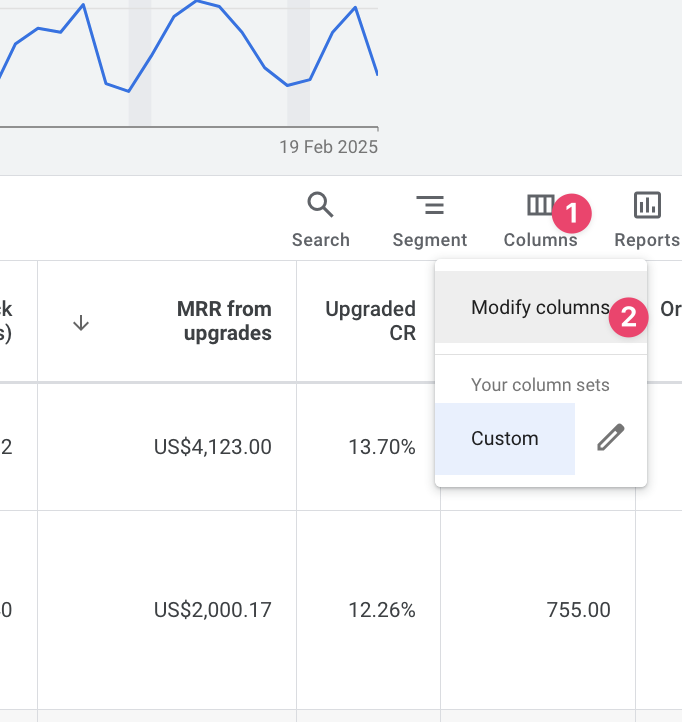
- Create a custom column

- Set the formula to be the new MRR generated divided by cost. Make sure you set the Data Format to ‘Number’ so that it will display correctly in the UI.
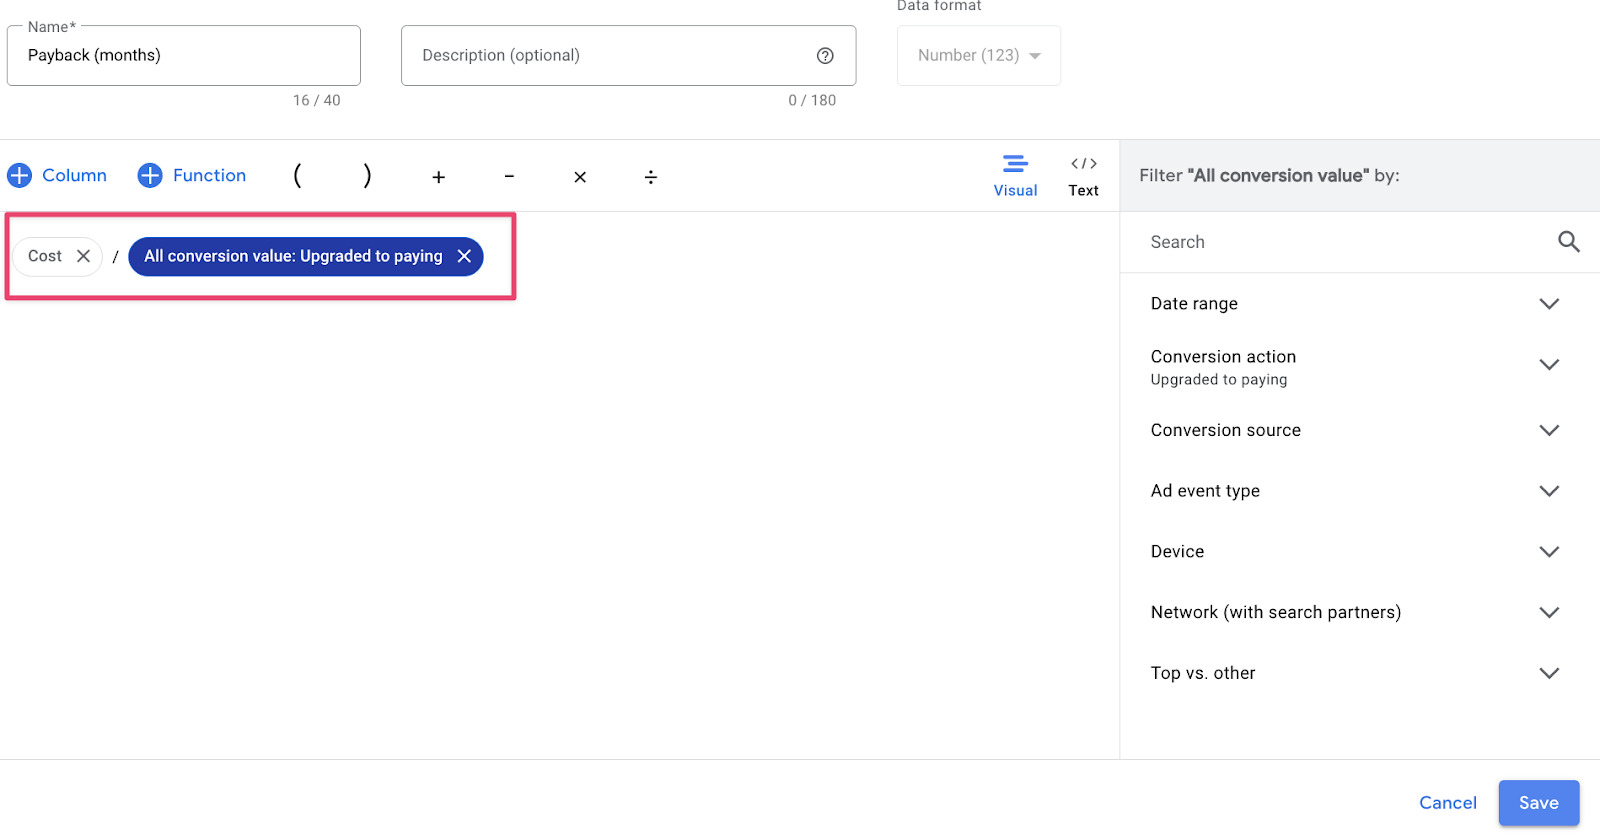
- Create another custom column with only the new MRR generated from the conversion. Often times brands will set different conv values for different actions on site, this will let you isolate the values come just from purchases/upgrades.
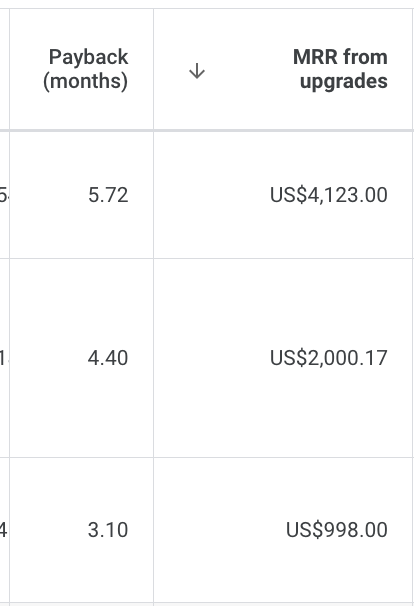
- Going back to the UI the final result should be the payback period and new MRR generated